Step 2: Create the CET database in your SQL Server
Detailed direction walking through how to restore a CET database in your own SQL Server.
Written By cedars team
Last updated About 1 month ago
Steps to create the CET database in your SQL Server
A note to readers: Please understand that we have no way of knowing your exact circumstances or server configuration, and are providing general instructions aimed to guide someone familiar with SQL Server but new to installing the CET database through the process.
Copy the
.bakfile you downloaded from CEDARS in Step 1 to your SQL Server machine (if you did not download the file there directly in Step 1).Note that these are large files and transfer speeds depend on your internet connection bandwidth.
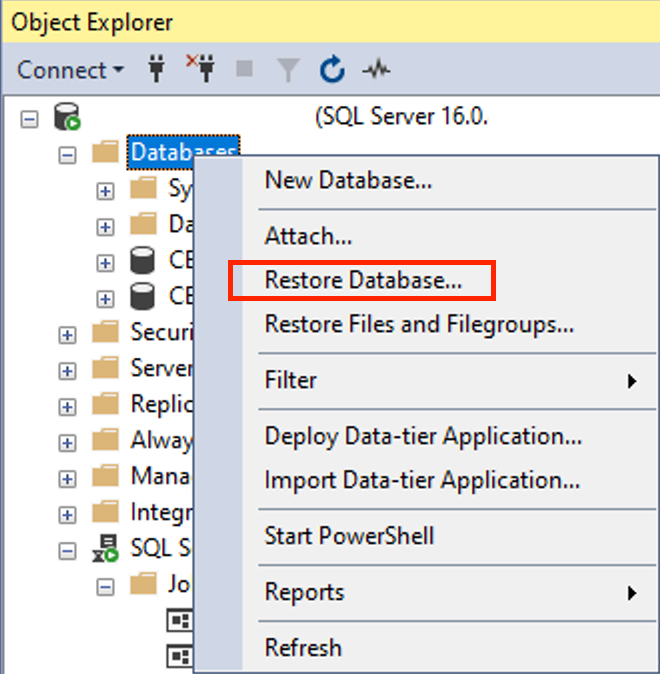
In SQL Server Management Studio, go to Object Explorer and right click Databases to access the menu options. Select Restore Database.
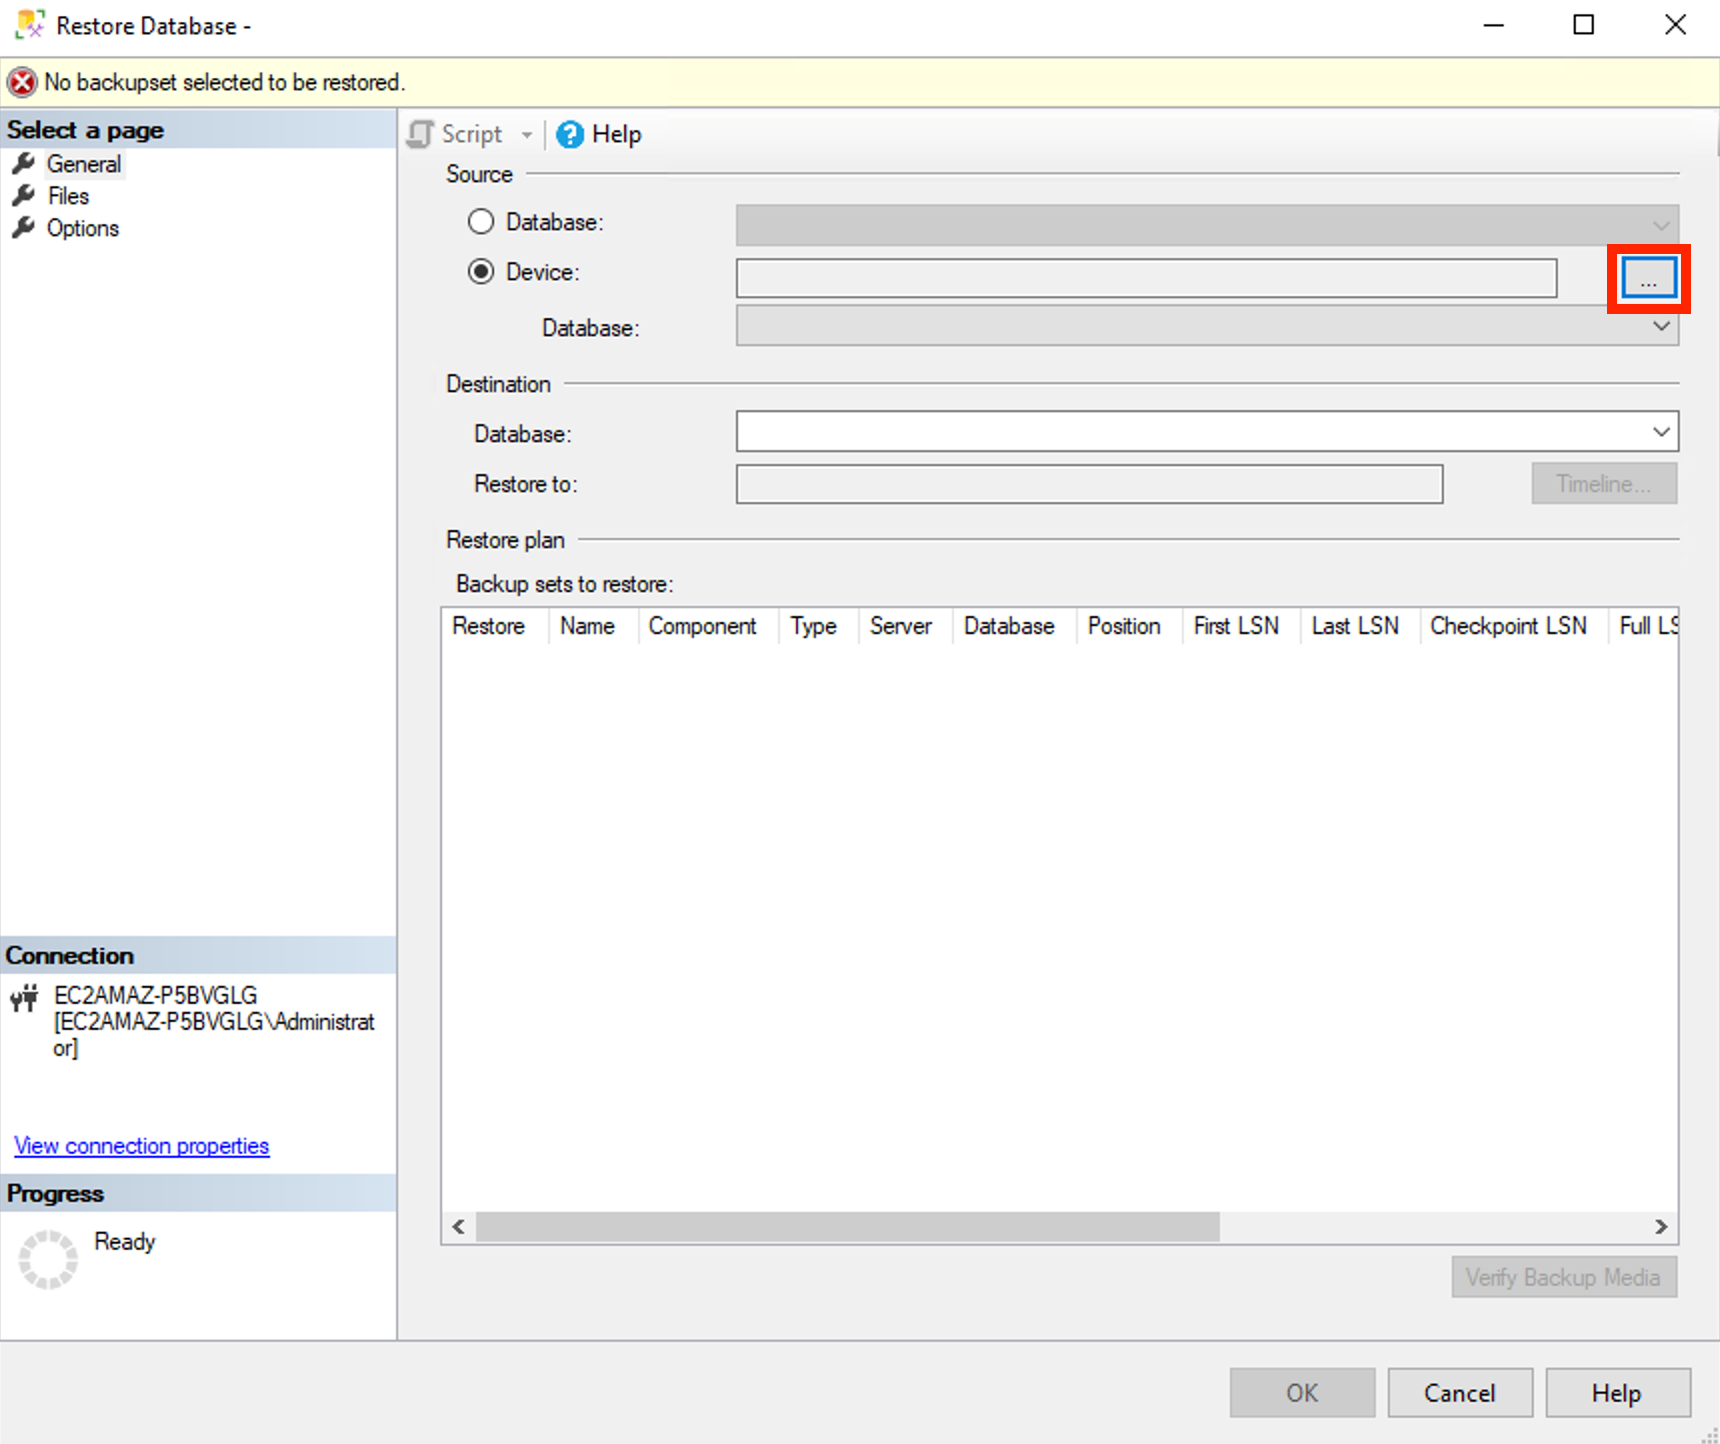
You will see a pop-up window titled Restore Database. At the top under Source, select Device. Then click the button with the ellipse i.e. three horizontal dots.
You will see a pop-up window titled Select backup device. At the top under Source, select Device. Then click the Add button.
You will see a pop-up window titled Locate Backup File. Use the object browser to go to and select your downloaded and unzipped
.bakfile. Click the OK button.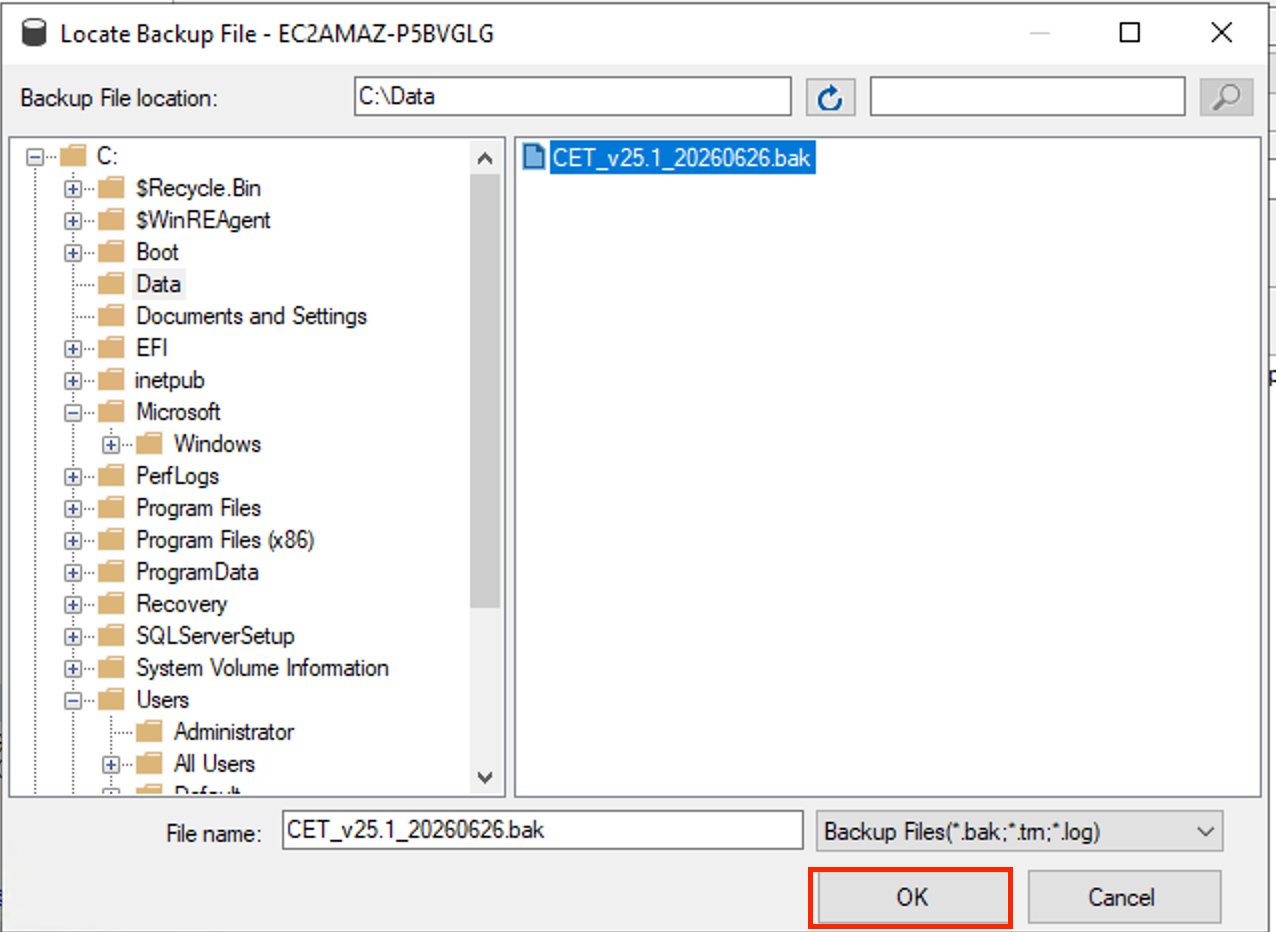
Click the OK button in the Select backup devices window.
If you wish, you may rename the database under Destination; if you have an existing database with the same name as the backup you are restoring you will want to give this new CET database a different name. Click the OK button in the Restore Database window.
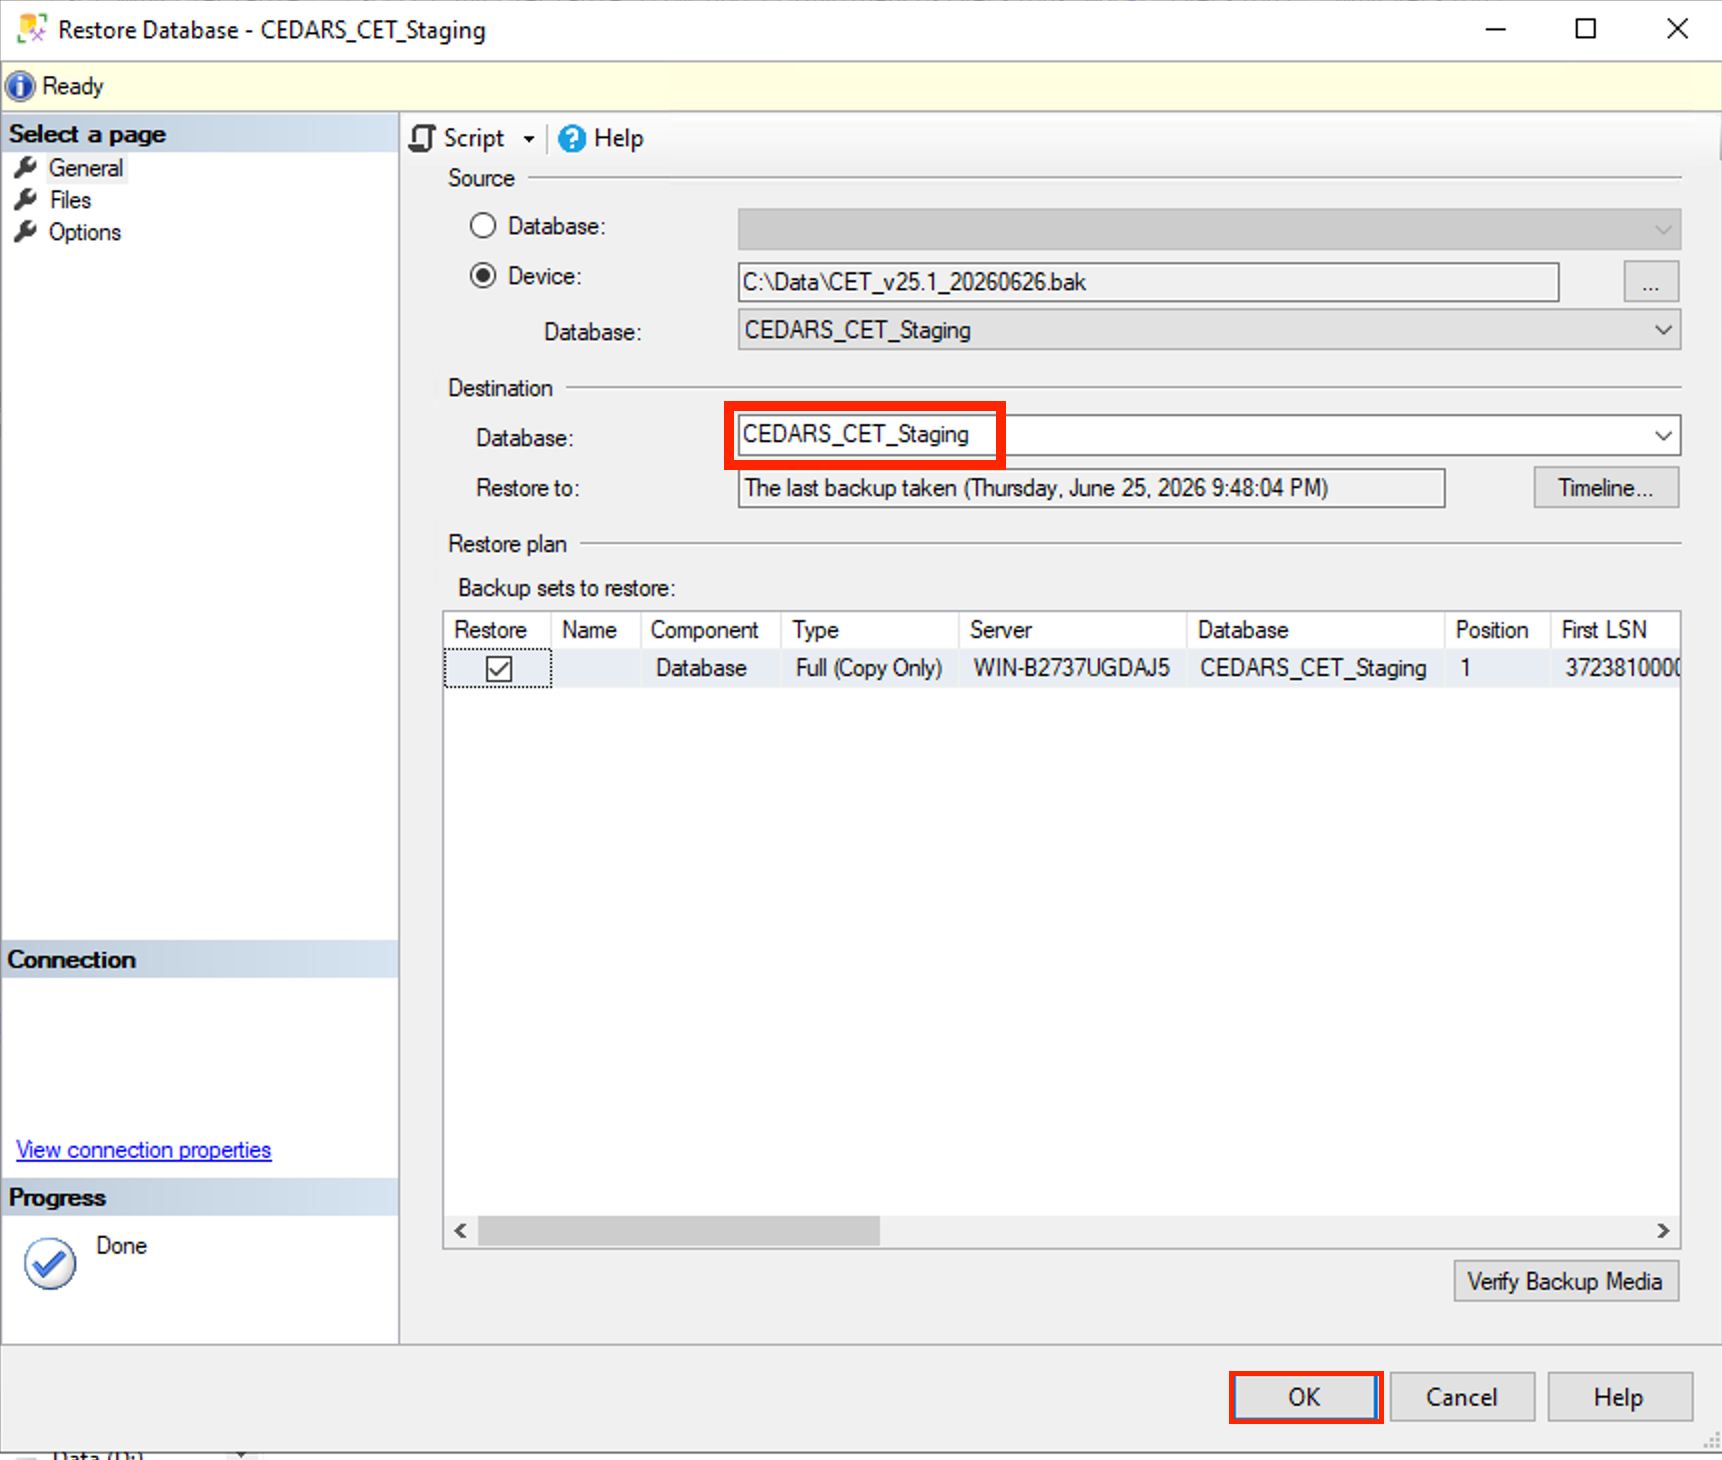
Wait while the green progress bar completes filling and SQL Server works to create the database from the backup.
You will see a SSMS pop up window that says Database {Name} restored successfully. Click the OK button.
The new CET database will now appear in your Object Browser under the name you gave it in the Restore Database window.
Was this helpful?
Still need help? Ask the team